Tel: 07879426788
Email: enquiries@meadowlark.co.uk
First steps with Lotus Approach
Small database development: Part 1
A simple Task Management database
We will develop a very basic database from scratch, that is about as simple as a database can be, but it will be genuinely useful and we will make it quite powerful. It will be a task manager. It will record what tasks must be completed, when and for whom. Lets get started.
Creating the tables
Start Approach, then click on the File menu at the top left of the screen. Click on the New database option. Make sure the Blank Database option on the left is selected and click on the Ok button. See Figure 1.
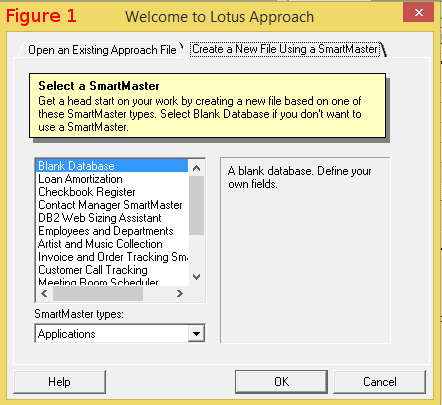
This is the first step in creating the database.
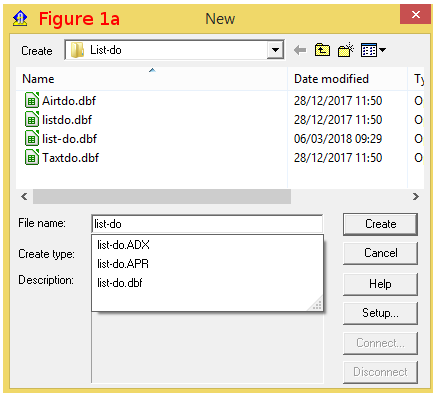
In the dialog box that appears, enter a name of the database file. This is where the data is stored. I keep my database names short, no longer than eight characters. Enter
list-do
and press the return key. See Figure 1a.
You will be presented with a small table looking like Figure 2 below.
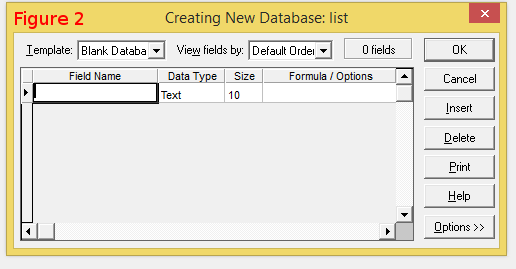
This is the table designer. It is very easy to use. You are going to be creating fields for the records that will be stored in this table. Remember, fields store tiny atoms of data, a group of fields make up a record, all the records and the tables combined make up the database in its entirety.
Creating the database table
First type a name for the first field. We are going to create what is called a primary key. Do this by entering a name in the white box on the top left. Type in
ipTask
then click or tab to the next field. I have named this field with some thought, as I will explain later. In the next field you are going to state what type this field is. Select Numeric and edit the number of decimal places it uses (it defaults to 10.2) change it to 10 This is akin to stating that the ipTask can store a digit that has a value with up to ten digits like 9999999999.
See Figure 3.In practice this means that the database can store a maximum of 9.999 billion tasks and no more. I think this is enough for a productive day at the office.
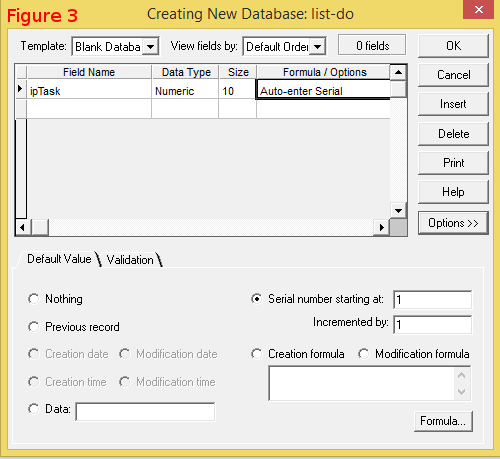
Next let us lay down some more rules about how this primary key field must behave. We can do this without writing a single line of code, it could not be easier.
We want this field to have values that are set by Approach automatically. By delegating this task to Approach, we do not have to worry it has been completed - perhaps by the user - each and every time it is necessary, and it will be necessary every time a new record is created. For simplicity we want the entered values to be incremented each time by one for every new record: a process called auto incrementation. We also want values in this field to be unique, and always filled in. If the field value is all these things, we know that we can search the records by the primary key field (ipTask) and know that we will find only one record for that value of ipTask. We have specified that the field must be filled in because otherwise there might be more than one record with a blank field, and our uniqueness property has failed. We achieve this by clicking on the tab
Default Value
under the table and selecting
Serial number starting at 1
make sure it is incremented by one as the figure suggests.
Next click on the
Validation
tab, and make sure the
Unique
box is selected and the
Filled in
box is selected
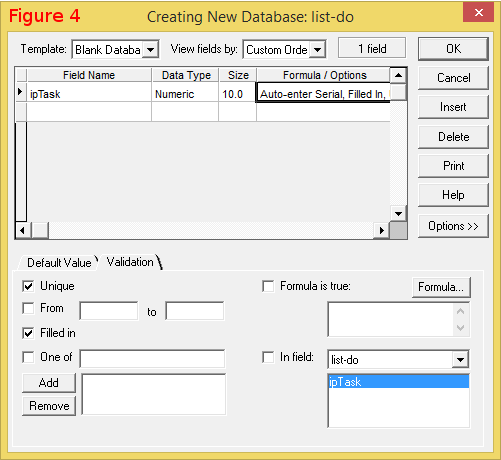
Let us explain what has been achieved without writing any code. See Figure 4.
In that single line in the database table designer you have started designing the structure of the record. You have created a primary key. You have said that the first field will always have a unique value, there will always be a value entered, you want Approach to enter the value automatically and that value will intitially be 1 and each subsequent value will be one more.
That is the hard work done, the rest of the fields are simple in comparison. You achieved this without writing any code.
Now click on the next row in the table see figure 5. First enter a name for this field, lets call it tTask and specify that it is text and give it a size of 50 characters as a maximum. Move to the next row and enter a field name of dStart give it a type of Date. You may need to click on the tiny arrow head on the right of the field and scroll up to find the Date option. Next, on the next line of the table enter a field name of dEnd and finally select a Date type. On the next line enter a field name of tComment give it a type of text and a size of 254 characters. Click on the Ok button to finish the design of this table.
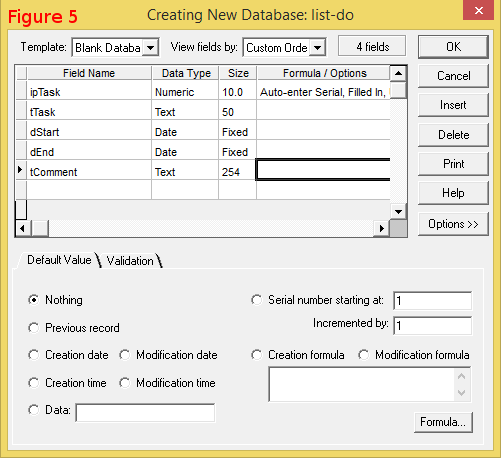 Figure 5.
If your are asked to save the file, do so.
A word about the naming of fields
You will notice that we gave the fields intuitive names with one or two lower case letters prepended.
This is to assist further database support, and help document its structure.
For example ipTask indicates that this field relates to some type of task, and that this field is of type integer (i) and this is a primary (p) key. Likewise dStart indicates this is a field indicating the start and it is of type date (d). Furthermore tComment is a comment field of type text (t). Notice how I have used camel notation (a mixture of lower and uppercase) to indicate the separate bits of information I am encoding in the field name. For ipTask the two parts are the ip and the Task. Another example might be tFirstName. The purpose of this field is quite clear, much clearey than for example fn.
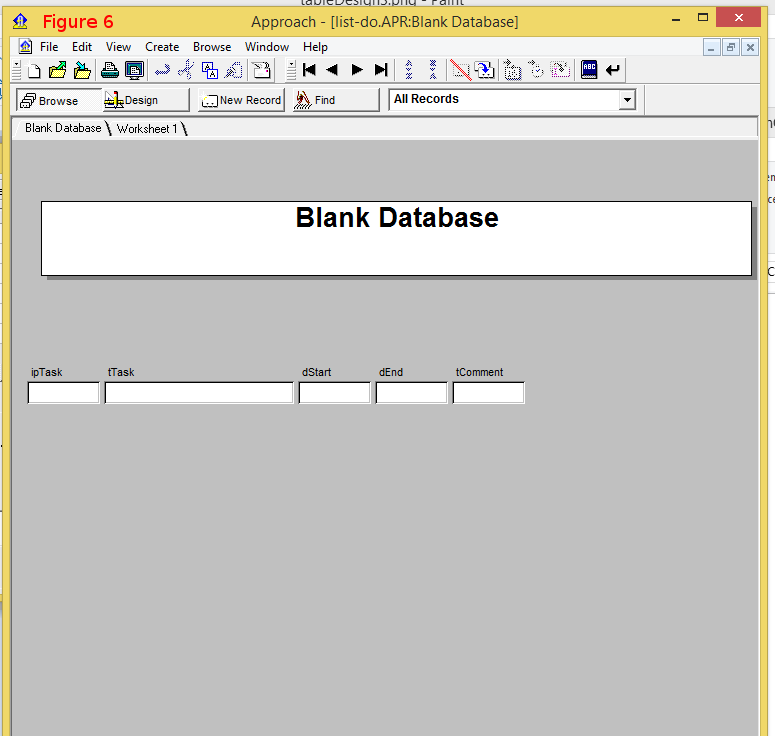
Not only have you created the holder of the data: a dbf file with the name list-do.dbf. Each dbf file is called a table, and for every table there will be a corresponding dbf file. This might be a bit different from some other database tools you have used. You have also created an apr file. The latter has an important role in Lotus Approach software development.
The apr file stores all the information about the application other than the data. It stores details about the user interface of the database: that which the user sees on the screen.
We are going to modify the form to make it more usable. To do this click on the Design button at the top of the screen.
You will see the screen change to indicate that you can now change what you see. With the mouse, click on the field called ipTask it will then become draggable. Drag it to the far right of the screen and right click on it, and select field properties. There is an option to set the field as read only, do so. 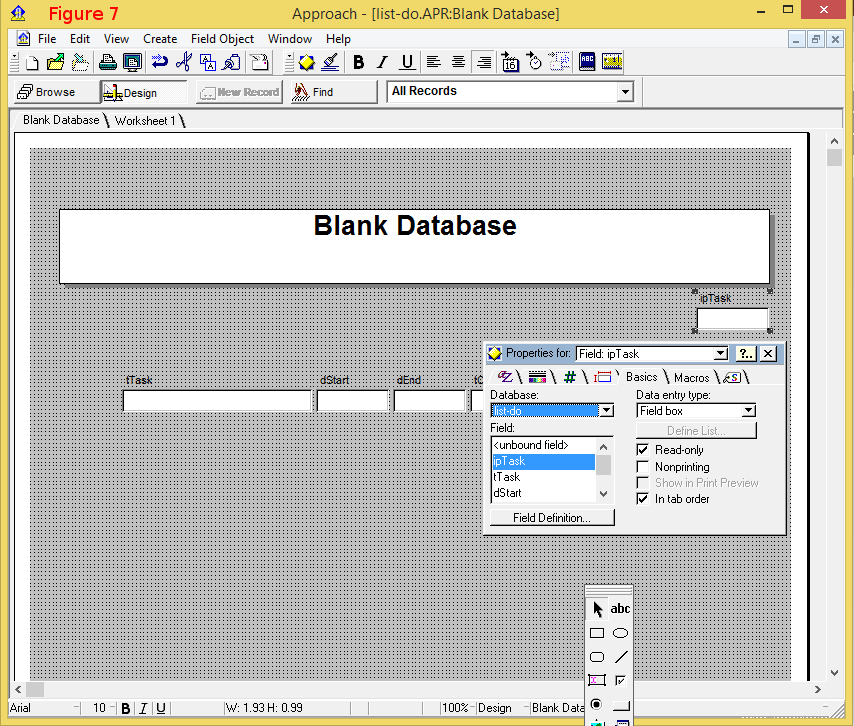
By setting this field to read only, only Approach can set its value. This is good. You do not want to accidentally change this value and confuse Approach. More than that you do not want the task of entering unique numbers that increase by one each time a record is created, it is too tedious.
Before you continue, press the
Browse
button (at the top of the screen) to ready the database for data entry. Now lets play around with the database and see what is does.
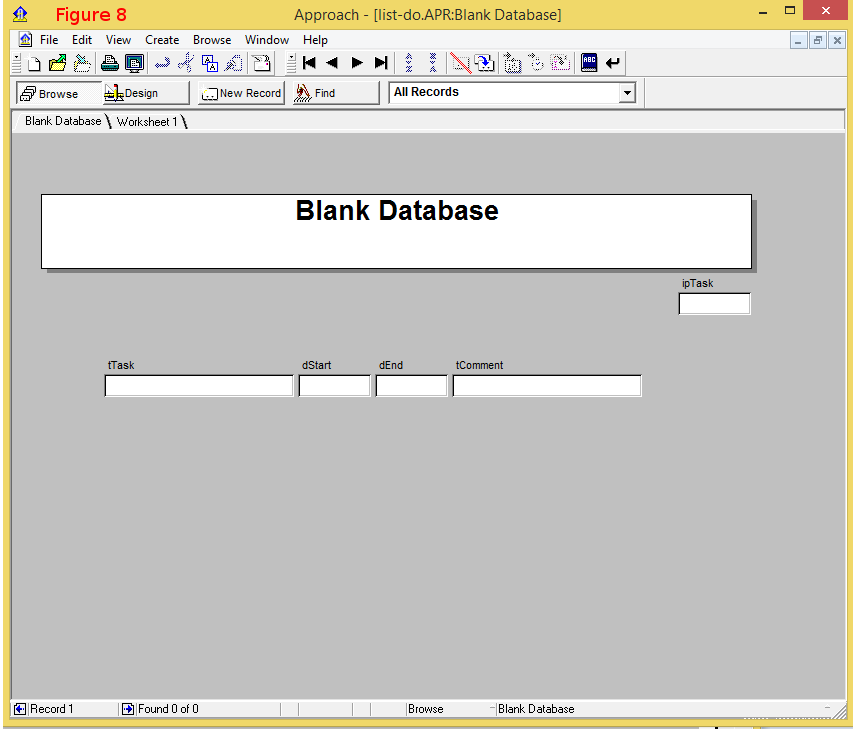
It should look like Figure 8
On the next page we will modify the user interface to make it more functional. We will enter some data and stand back and admire our digital baby. Its an ugly baby, but let us not be shallow.
Previous Next